Getting Started
VirtualGlass allows the creation and customization of glass pieces in a number of ways. Here we offer a step-by-step tutorial introducing a number of features found in the software.Please send the VirtualGlass team any questions you may have about the software.
Download and Startup
- Download the newest release of the software from the download page.
- The software is packaged as a zip file. Unzip the file using the prepackaged software with your operating system.
- The extracted files are either a directory containining virtualglass.exe (Windows) or a single VirtualGlass.app file (Mac). Double-click to start the application.
Computers without GPU hardware support for advanced graphics features (such as shaders) may render glass cane and pieces with artifacts, including white or opaque glass, blocky or pixelated glass, or strange shadows or illumination. Turning off GPU rendering by unchecking the "GPU Transparency" option under the "Performance" menu will fix these issues.
Interface
The interface consists of two main panes: the library and the editor. Clicking an object (a color, cane, or piece) in the library causes the object to appear in the editor. The editor's layout depends upon the object selected:


An Example
Here's a step-by-step tutorial for creating a simple piece in VirtualGlass. The piece is pictured below and can be downloaded as example-piece.glass and opened in VirtualGlass using "Open" or "Add" options in the "File" menu.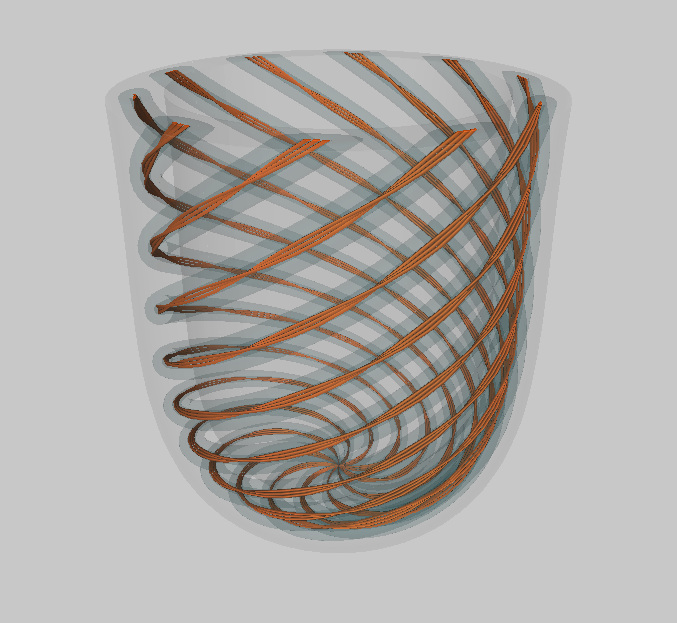
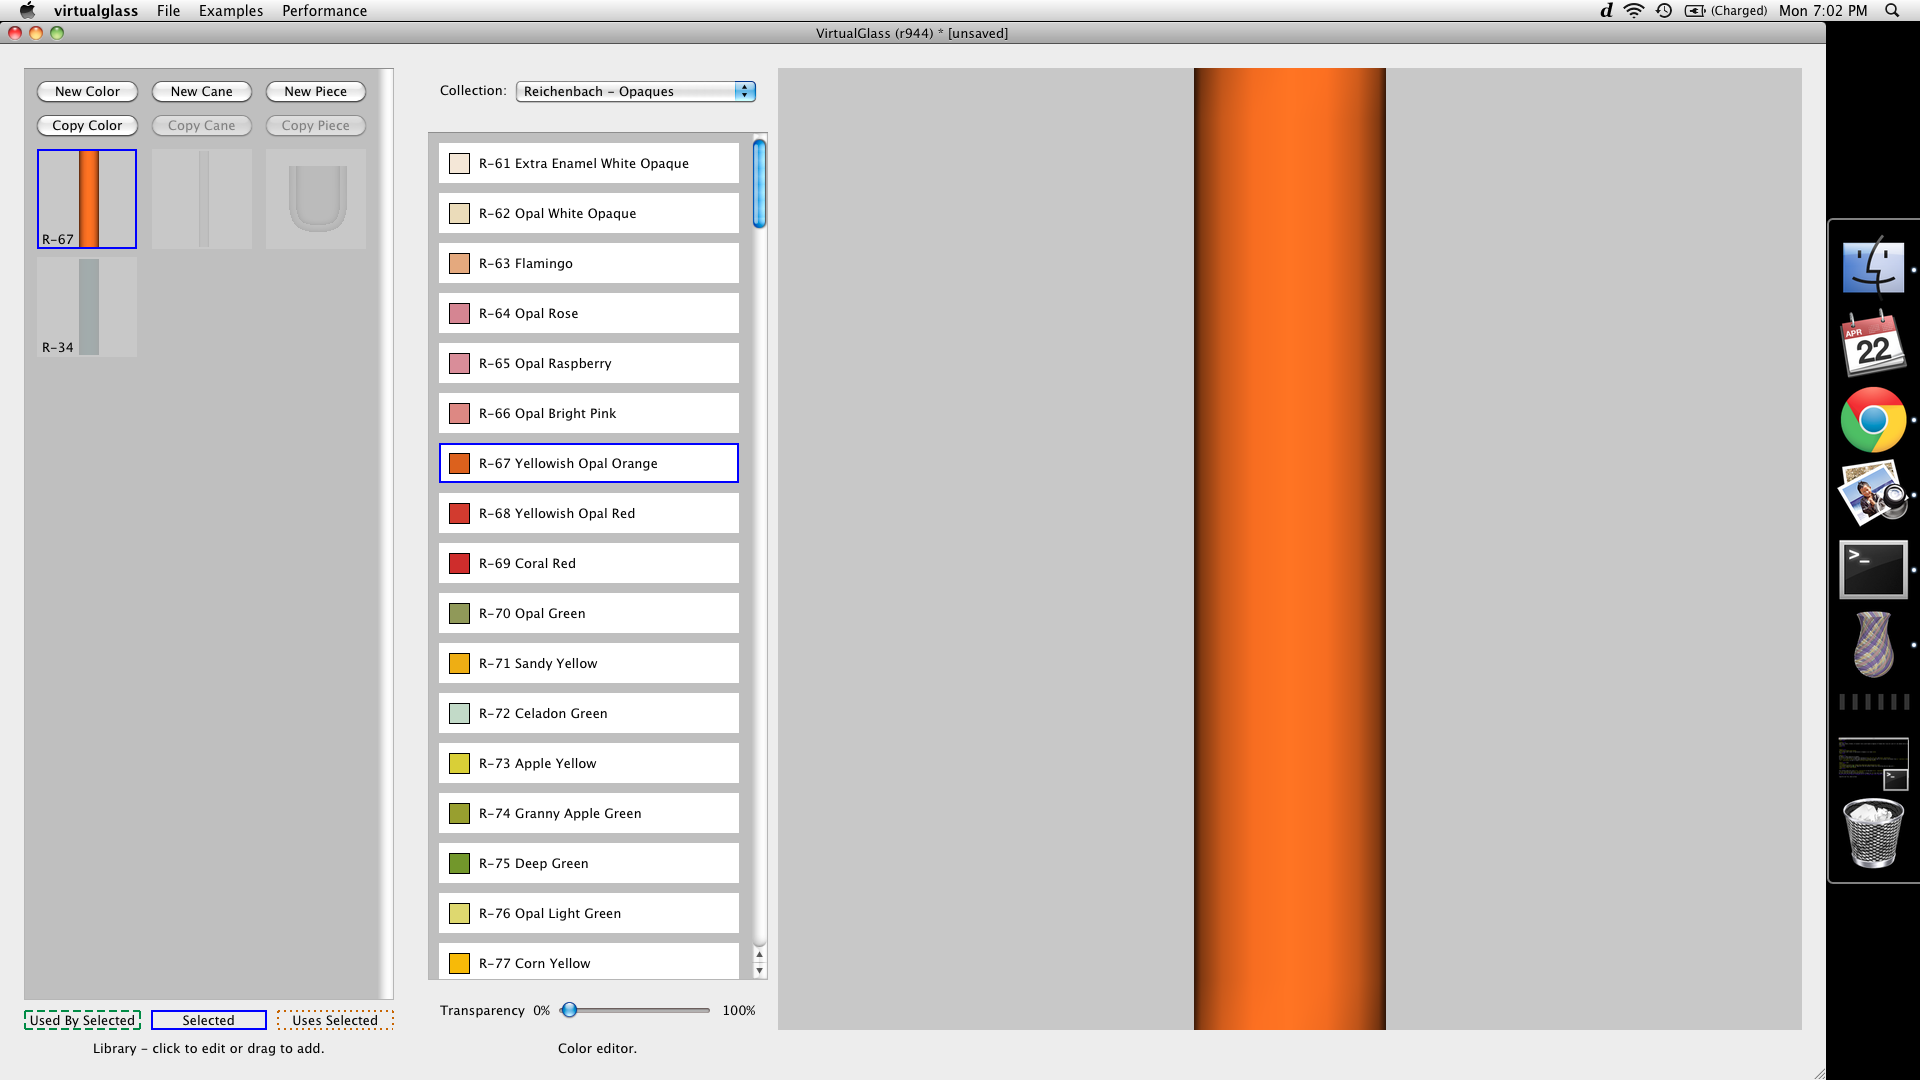
Step 1: Colors
Colors in VirtualGlass come in groups called collections. The default six collections are the opaque and transparent color bars produced by Reichenbach, Kugler, and Gaffer. For this example, an opaque Reichenbach color, Yellowish Opal Orange (R-67) is used for the cane core, and a transparent Reichenbach color, Dark Lagoon (R-34) is used as a casing. After starting VirtualGlass, select the default color object from the library. This object has a default color, Clear (R-100), and the number R-100 is seen in the lower-left corner of the library icon.Select the "Reichenbach - Transparents" collection from the collection menu, scroll downwards to the Dark Lagoon (R-34) color entry, and click to change the object's color to Dark Lagoon. The "Transparency" scroll bar below the color collection directly controls the how thin the color appears. Move the scroll bar to about 90% transparency.

Next, create a second color by pressing the "New Color" button in the library. Set this color object's color to Yellowish Opal Orange (R-67), found in the "Reichenbach - Opaques" collection. Opaque colors have default transparency 0%, and transparents have 50%, though both can be changed freely.
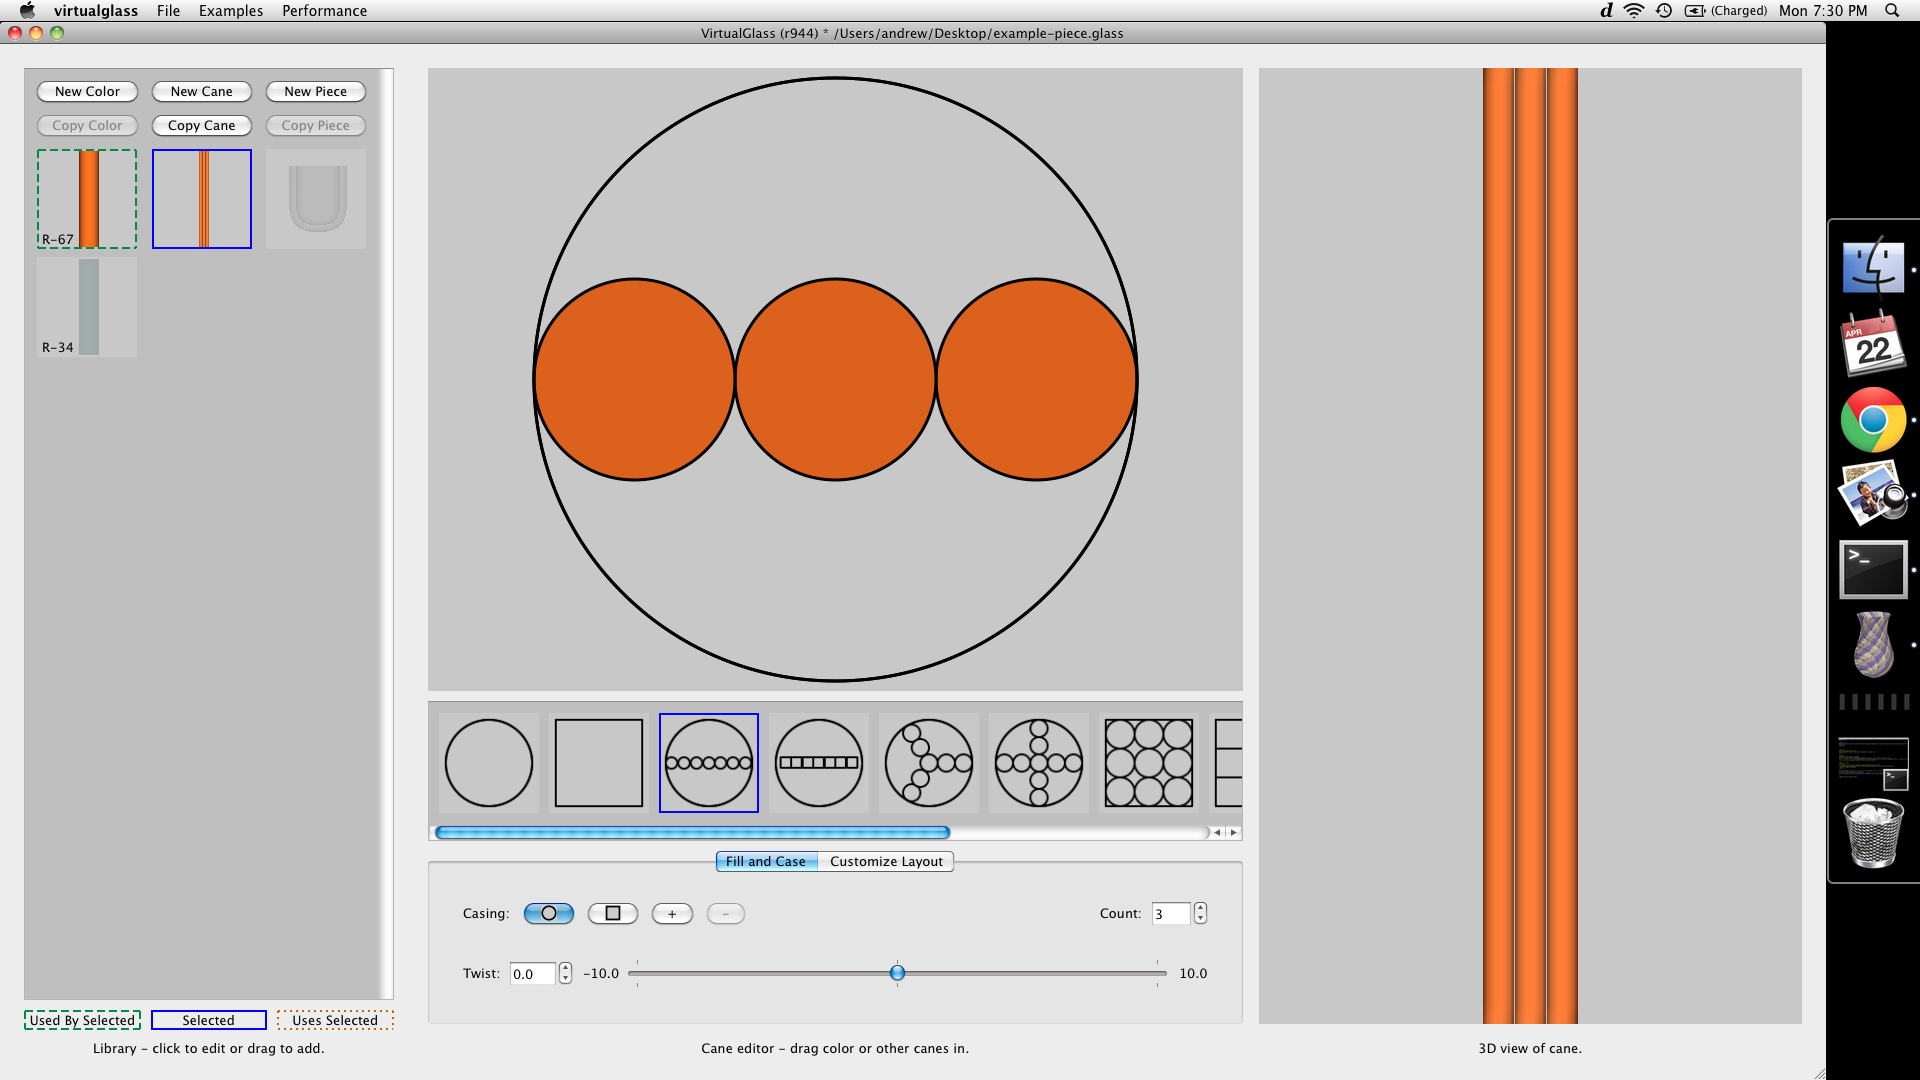
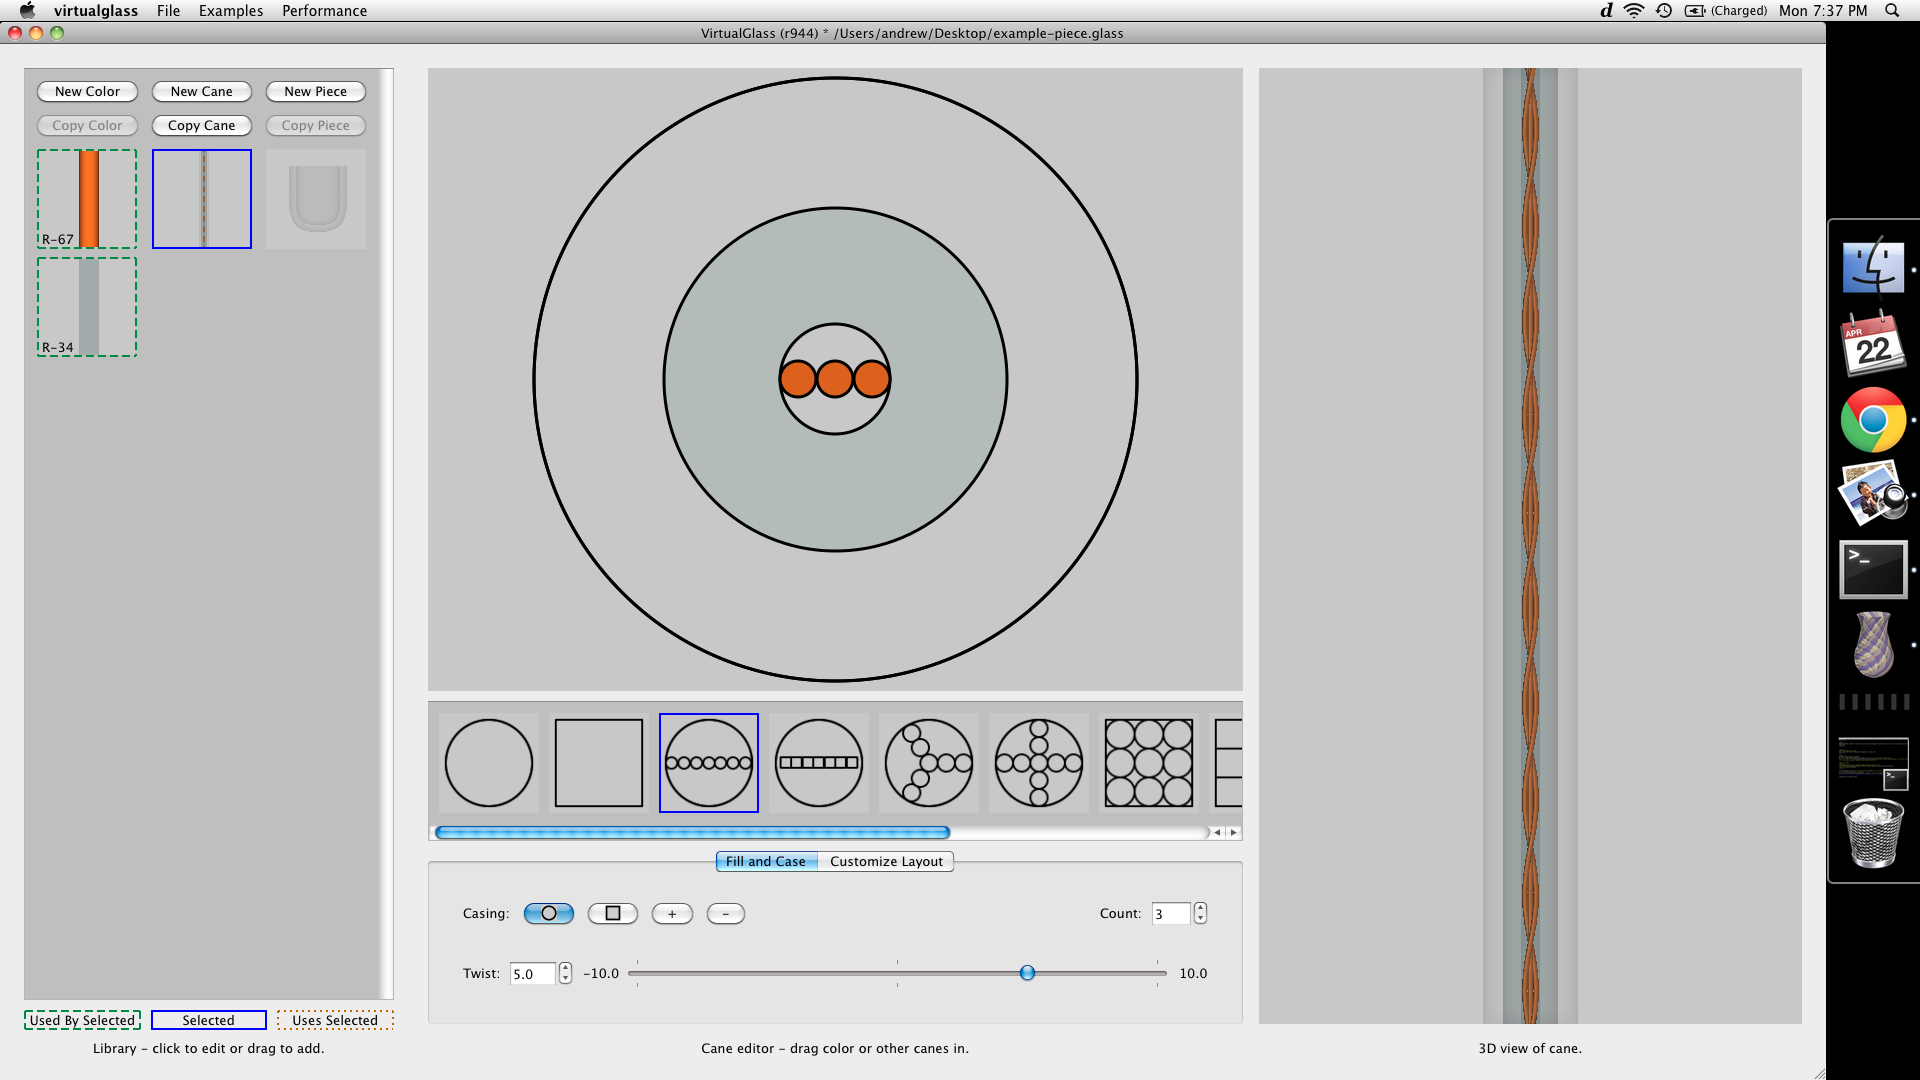
Step 2: Cane
Select the default cane object in the library, causing the editor pane to switch to the cane editor. The cane's cross-section is determined by the cane's template, selected from the template library. The default template consists of a horizontal row of subcanes, and the number of subcanes in the row is determined by the template's count, seen in the upper-right corner of the editor controls. Change the count to 3.The editor displays the cane's cross-section, consisting of a number of subcanes cased (surrounded) by layers of casing. Subcanes are clear color by default, and can be filled with color or other canes by dragging library objects into the subcane locations in the editor. Holding the shift key while dragging fills all subcanes with the same color or cane. Fill the three subcanes in the template with the previously made Yellowish Opal Orange (R-67) from the library.
Next, add two layers of circular casing by pressing the "+" button in the editor controls. Each layer of casing (except the outermost) can be resized by clicking on the boundary of the casing and dragging towards or away from the middle of the cane's cross-section. Resize the two inner layers to the thicknesses seen in the image below:
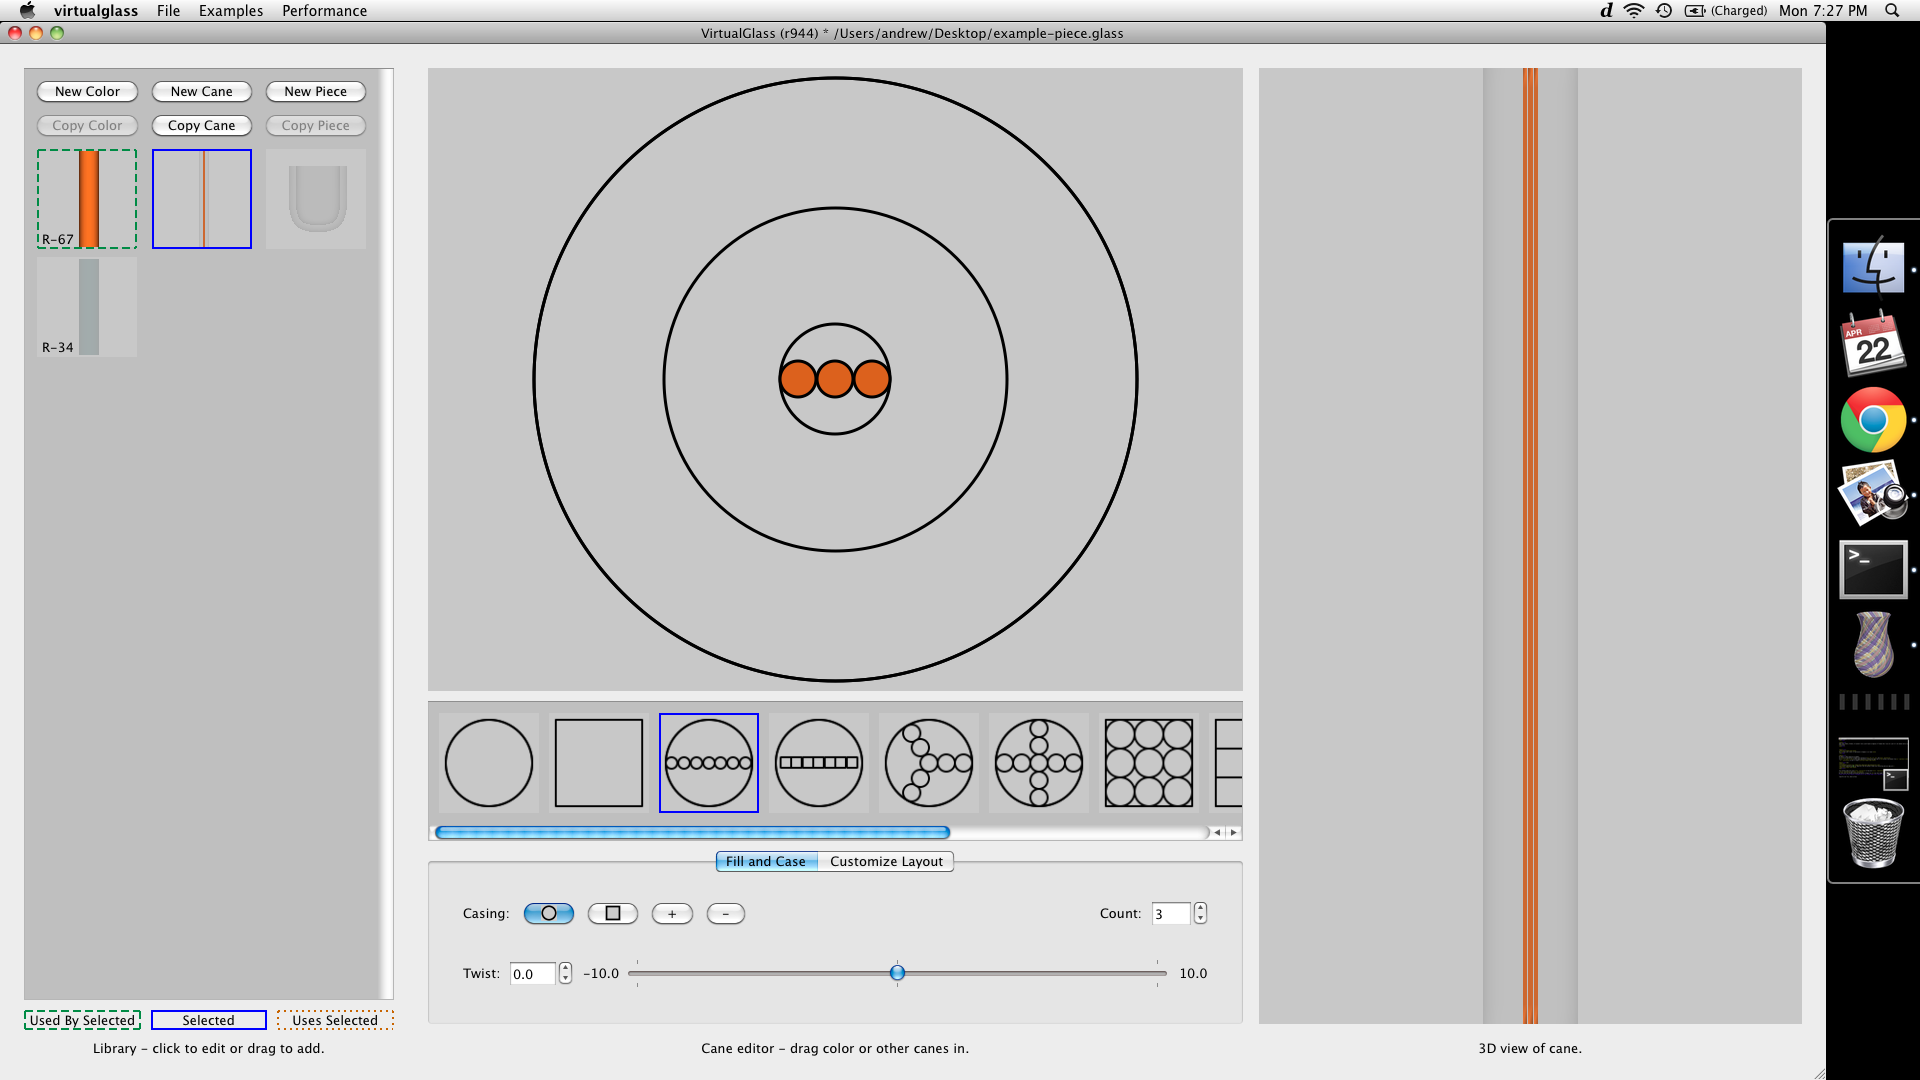
Change the color of the second casing layer to the highly transparent Dark Lagoon color made previously by dragging this color object into the casing region. Now add five (5.0) rotations of twist to the cane by adjusting the twist controls to yield a finished cane.
Step 3: Piece
Select the default piece object from the library, causing the editor pane to switch to the piece editor. The piece editor is actually two editors:- A pickup editor (left), controlling the slab-like arrangement of canes called a pickup.
- A piece editor (right), controlling the three-dimensional shaping of the slab to form piece.
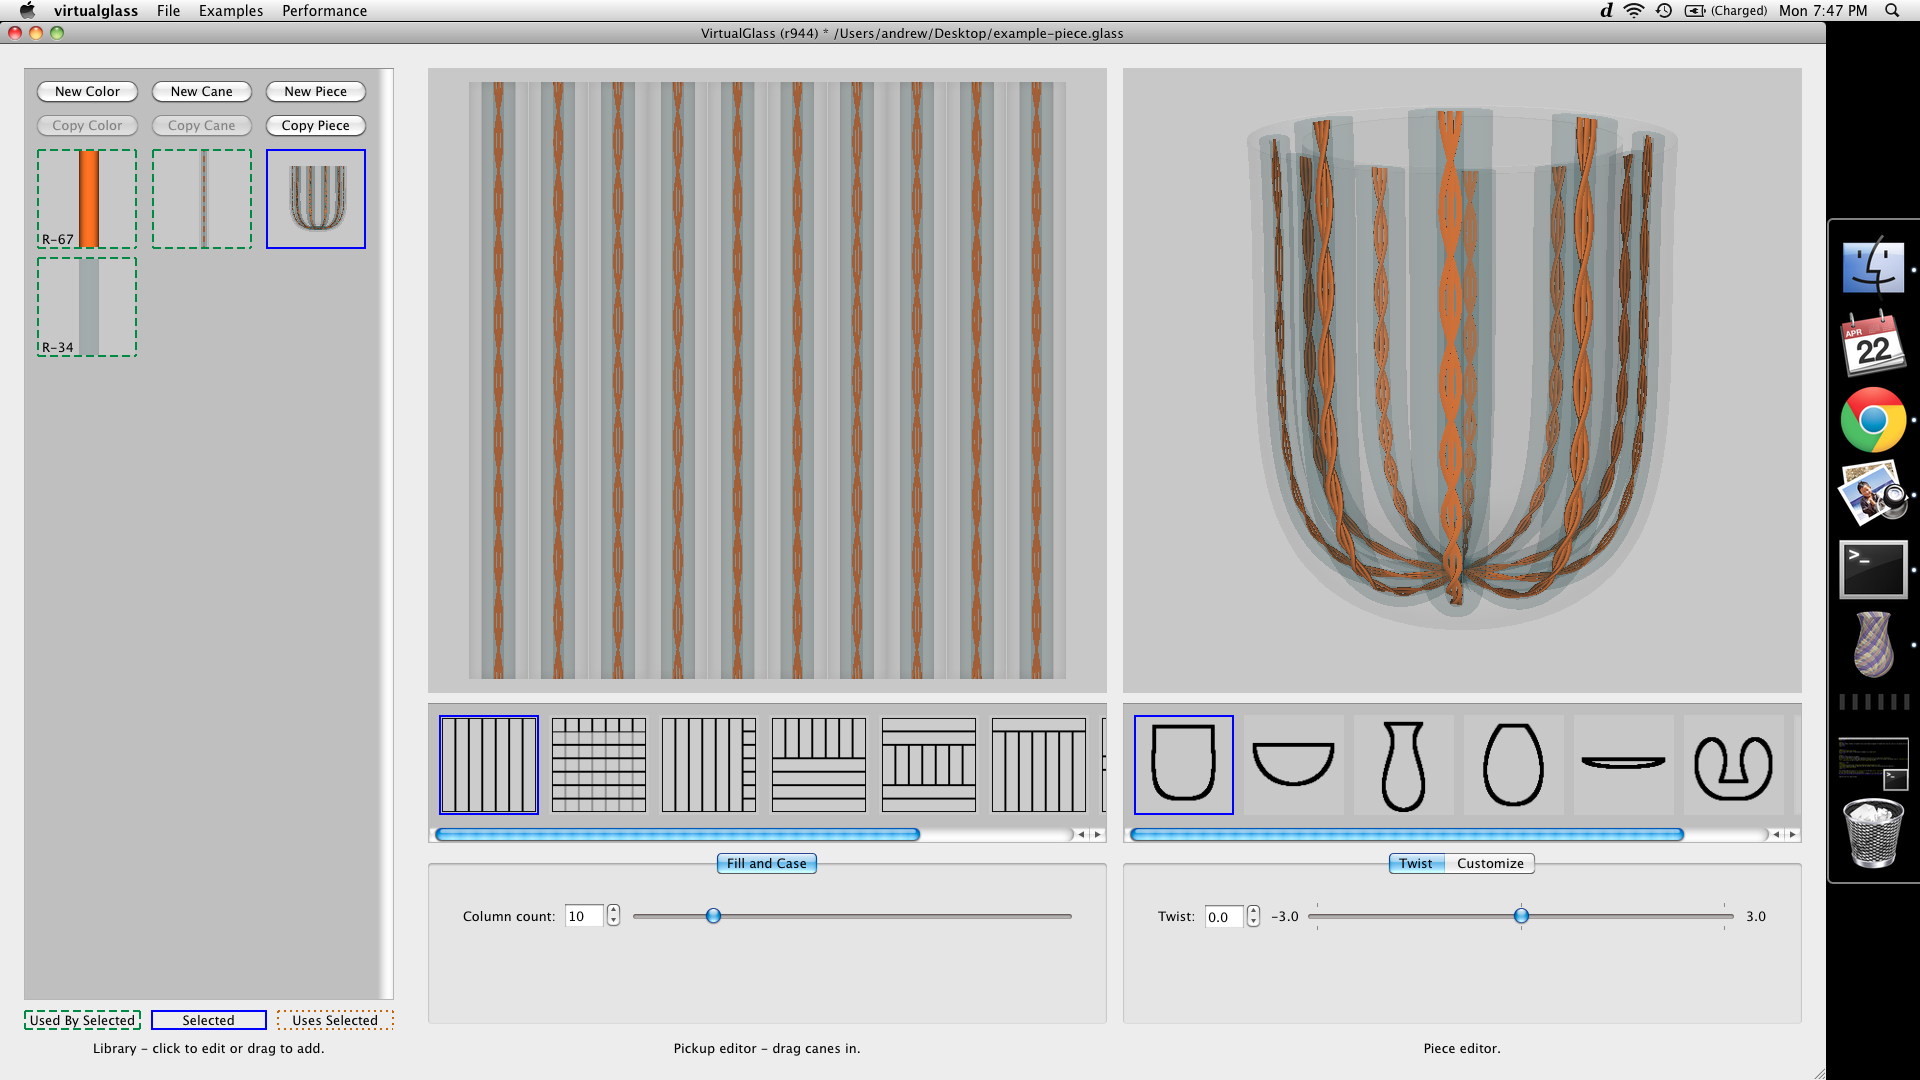
Add one unit (1.0) of twist to the piece using the piece editor controls to yield a finished piece.
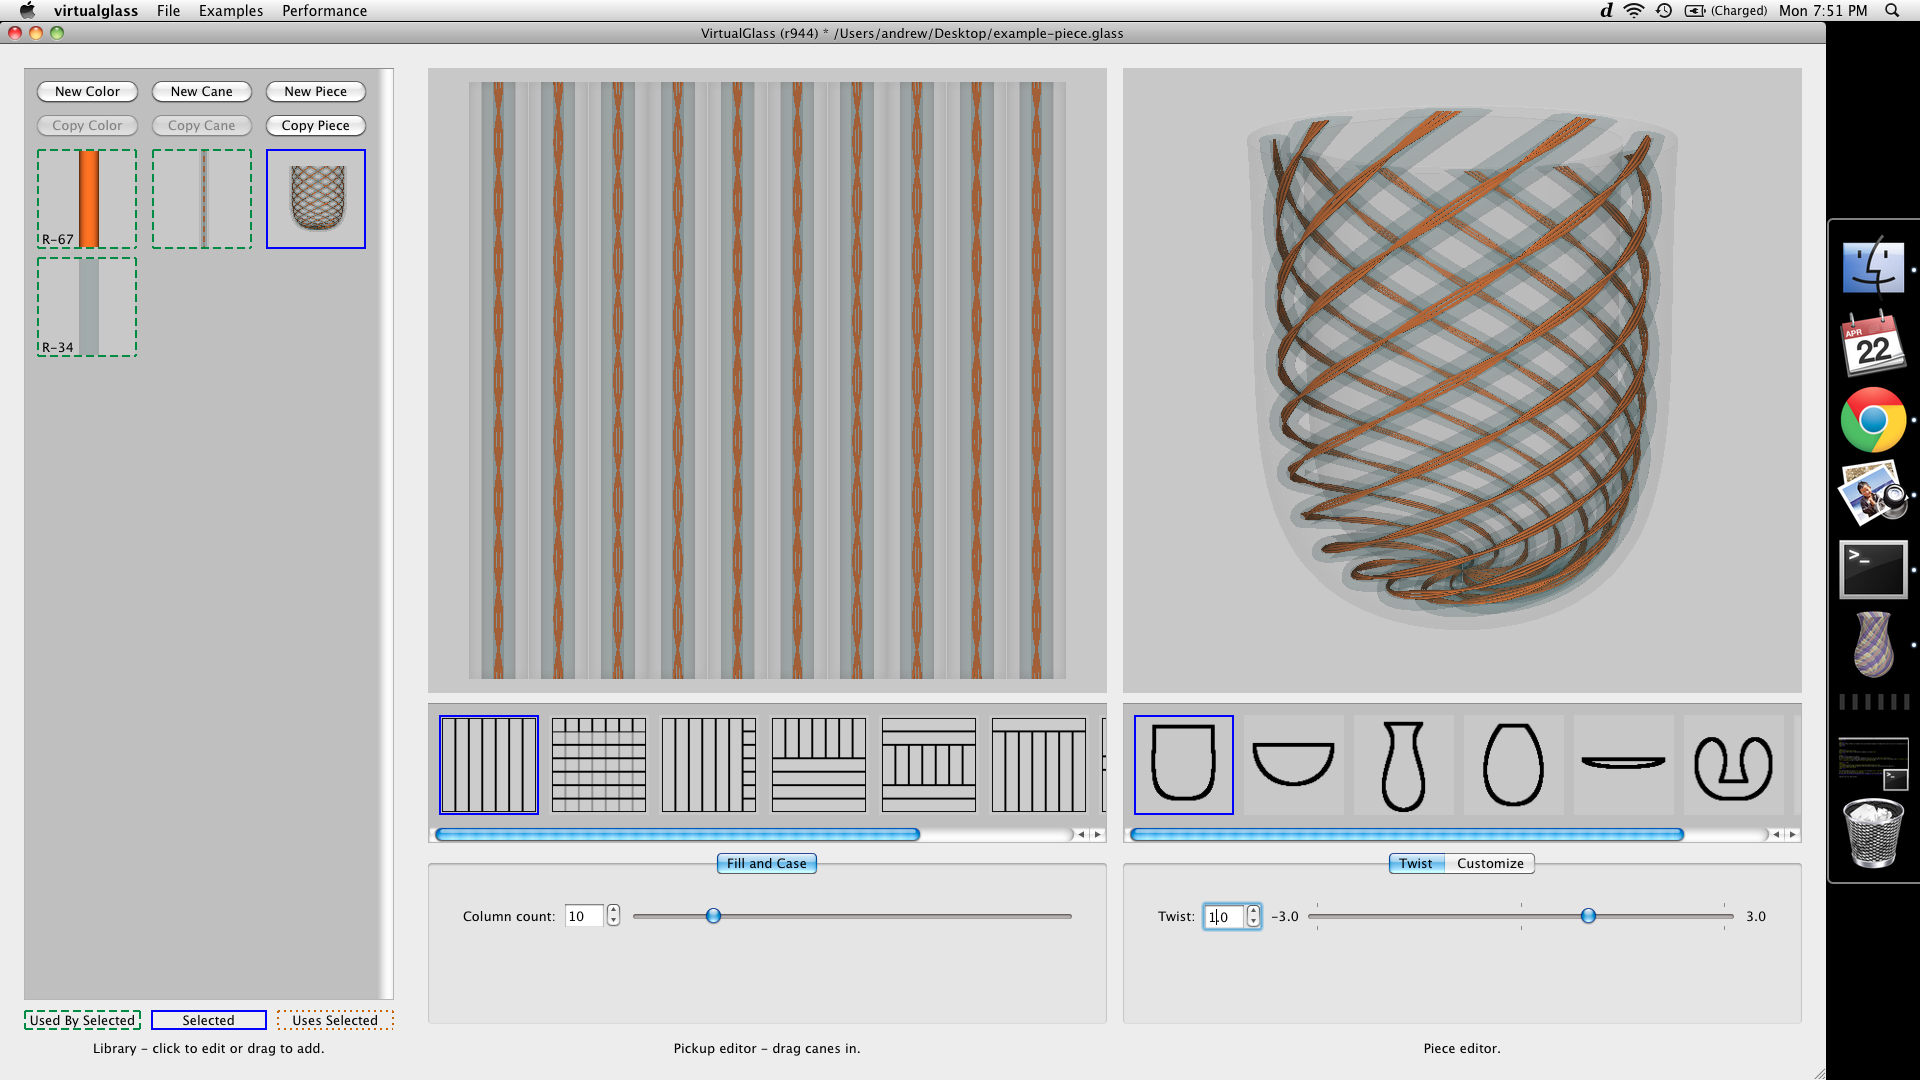
Save your piece as a .glass file by selecting the "Save" option from the "File" menu, or compare your piece to our example by downloading example-piece.glass and opened in VirtualGlass using the "Add" options in the "File" menu. For more examples, try the random glass generator options in the "Examples" menu. Also, feel free to send the VirtualGlass team any interesting cane or piece designs.